I have wanted an outdoor sink for a while, but didn’t like the look of the bulky wooden frames with larger stainless steel sinks.
My original plan was to try to mount a reused kitchen sink into the frame of a used grill. I wanted something light, with good sized wheels that would be pretty mobile in the yard, preferably stainless steel that would match my grill. I did not have any luck finding a decent grill frame and sink that would fit together without needing major alterations.
Searching the web I came across someone that did it with an IKEA sink and this serving cart. Their post had no instructions and, as far as I can tell, actually listed the wrong name for the sink used.
Looking at IKEA’s website, the sink and cart dimensions were close, but different enough that I was not confident it would work together. But I decided to take a chance.

Photo: IKEA.com
IKEA items for a stainless steel outdoor sink:
- Klasen serving cart
- Fyndig single bowl top mount sink
- Fixa 2-piece tool set
- Tostero grill cover

Started by putting together the Klasen outdoor serving cart/grill base. Once together I put the Fyndig sink on to see how it would fit. The sink was too large, as I had suspected. The mounting brackets on the underside of the sink did not fit inside the frame of the cart. There was really no great way to mount the sink onto the frame the way that it was.

While trying to come up with a way to secure the sink, and considering major alterations to the sink and cart, I eventually noticed that the cross frames for the cart are wider on the top and thinner on the bottom, and by mounting them upside down I could gain a little bit of space.

This is the intended way for the frame to be installed.

This section I have flipped. I also had to address the mounting bracket that is used to connect ikea’s grill to this frame. The width of this bracket is the same at the top and bottom.

Removing the bracket would not have been easy, but using my bench vise, I was able to compress/fold the bracket until the bottom was the thinner width.

After compressing in the vise.

Incredibly, flipping the support bars made the sink fit perfectly in the top of the serving cart. Now I had to figure out how to secure it.

The mounting bracket of the sink just barely fit in the cart frame, getting it in took some minor manipulation of the bracket. However, the mechanism for mounting the sink to a counter-top did not work with the design for mounting the top of the serving cart to the frame.

I used the mounting clips that came with the sink to top mount it to a kitchen counter. Marked a spot on the frame that lined up with the connection to the sink, and drilled a hole for for the screw.

Using the supplied mounting clips for the Fyndig, the sink is mounted to the frame.

Looks great, low profile, light weight and mobile, and matches the stainless steel grill look that I wanted.

Used the Fixa knockout from IKEA to put a hole for the faucet and soap dispenser. This required drilling a hole in the stainless steel large enough for the knockout to thread through.


Hooked a garden hose up to both the hot and cold water lines. My water pressure is a little weak, still haven’t worked out why that is.

Installed the basket strainer with a straight extension into a 6 gallon galvanized bucket.
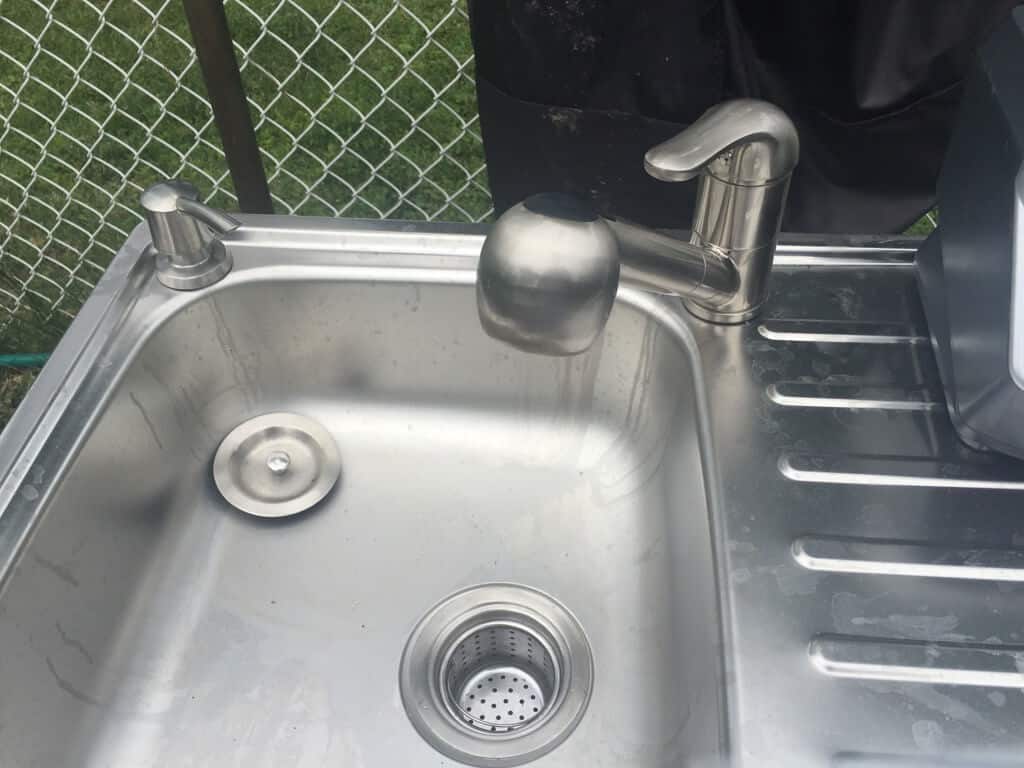
I bought the strainer, faucet, and soap dispenser on Amazon. The rest of the plumbing parts and bucket came from the hardware store. The soap dispenser was a tight fit in that corner, but I was able to wedge it in. The wife found some environmentally friendly soap to use.

IKEA makes a grill cover for the Klasen Grill called the Tostero that fits this pretty well. I’m really happy with the way it turned out.
Original post here.
~ by Brink
Great find from source: IKEA Hackers
Comments
Post a Comment