
Due to limited space, I needed a makeup table for my bedroom that was as shallow as possible but would still provide storage. Needless to say, I couldn’t find anything on the market to fit my needs. So it was custom or nothing. Oh, and it needed to be inexpensive. (Those requirements do not usually go together.) ![]()
I liked the Ekby Alex wall shelf with drawers for depth…

But the drawers are very shallow, and I wanted more storage than was provided in one unit, so I decided to combine two units.
I had previously made a one-unit table for my daughter (picture at end), using standard IKEA legs, and she loves it, but it’s not as elegant as this one, and for me, the double storage was a must-have.
Doubling up on the storage, however, meant standard height legs would make the table too tall. So I found a wonderful resource for customizable U-Legs on Amazon here: 23″ Tall X 11 3/8″ Wide Raw Steele Table Legs, 2″ Flat Bar, Set of 2. Their price is far better than any other source I could find.

As you can see, I custom ordered them in the 2″ width (3″ also available), 23″ tall and 11 3/8″ wide. 11 3/8′ is the depth of the shelf unit. This resulted in a console/ makeup table that is 32″ high. (Each shelf is 4.5″ tall, for a total of 9″ when 2 are combined. When you add the 23″ U-legs, the total height is 32″). You can make yours shorter, but be careful or you won’t have good leg room if you want to sit with your legs under it as you would a dressing table.
Materials:
- 2 Ekby Alex Wall Shelf units
- 2 Steel U-legs (custom ordered/Amazon)
- 1 can Rustoleum Gold Metallic Spray Paint
- 2 flathead screws – (approx. 3/4″) for joining the two units together
- 8 flathead screws – (3/4″ or longer) for attaching outer legs to the outer edges of the drawer unit
- 6 flathead screws – (5/8 to 3/4″) for attaching inner legs to bottom of the drawer unit (under drawers)
note: you should measure for best screw size
Steps to hack a modern makeup table:
Attaching the two Alex units to create one 4 drawer unit.
1. First I assembled one complete unit according to the instructions provided by IKEA.
2. Then I built the second unit completing everything minus putting the top on or inserting the drawers (sorry no pic).
3. I then screwed the two units together by setting the second unfinished unit on top of the first finished one. I screwed through the bottom of the second unit into the top of the first using wood screws that I had on hand. You want to make sure the screws are not too long. Just long enough to attach the two units without breaking all the way through the wood of the bottom unit. I only used two screws for this as that felt really secure. It would be nearly impossible to attach the two units together if they were both fully assembled. But it’s very easy if you do it the way I described.
4. Once the two units are secured together, you pop the top of the second unit into place using the provided locking nuts and then add the drawers the same way you did with the first unit (as per IKEA instructions). Your 4 drawer unit is now complete and ready for legs.
Attaching the legs:
1. First I cleaned the U-legs with alcohol. I then painted the legs with Rustoleum Spray Paint in Metallic Gold. (I got excited and forgot to prime them. ![]() But so far the paint seems to be holding up fine.) I researched the best gold paints and this one was highly recommended. I’m pleased with the results as the paint matches my bedroom sconces perfectly.
But so far the paint seems to be holding up fine.) I researched the best gold paints and this one was highly recommended. I’m pleased with the results as the paint matches my bedroom sconces perfectly.

2. After letting the legs dry according to the paint can’s instructions, I turned my now double drawered unit upside down and attached the legs with 14 gold-tone, flat-top wood screws that I had on hand. (see materials list for sizes)

Again, just make sure your screws are not so long that they could penetrate beyond the wood into the inside of the unit where the drawers are. The U-Legs come with 4 outer holes and 3 inner holes for attaching them to whatever you’re building. The 4 outer screws can be longer than the 3 inner screws since they are going into the outer edges of the unit, which is all wood. The 3 inner screws, however, should not go all the way through the wood or your drawers might catch and hang up or be damaged.
So that’s pretty much it.
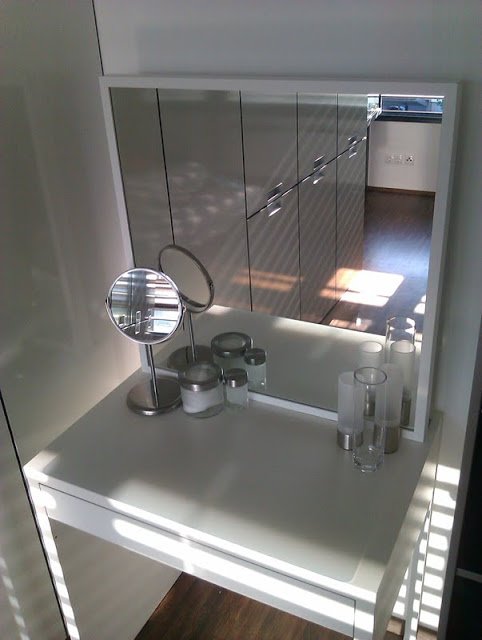
I added the 25.5 x 25.5 NISSEDAL white mirror that IKEA sells, and one of their NILS stools, topped with an IKEA RENS Sheepskin.

Finished dimensions of makeup table: 46 7/8 wide x 11 3/8 deep x 32″ high
Haven’t hung the mirror yet. ![]()
Overall, it came out perfect for me and looks really great. Much better than the pictures, honestly.
Oh, and for comparison, this is what it looks like using one unit and inexpensive IKEA legs.

~ by Penny
Take a look at more makeup table designs

A classy makeup table that is so easy to hack.

A wall-hung beauty bar that doubles as a laptop table.
A compact makeup table from a MICKE desk and a mirror.
Great find from Source Ikeahacker
Comments
Post a Comment