Now if you don’t know what a nib wall is you have definitely not been reading my older articles! but hey it’s no worries please click the link here for a great description.

Enough of me trumpeting my own horn lets get to what you are here for the classic debate of nib wall versus nothing or a gap lets call it. Most bathroom renovations we do in Perth, Western Australia have what I call the classic family bathroom gap. This is where the “gap” will occur between the shower screen and the vanity. Most likely if you have a bathroom like below you will have a very poor use of space as bathrooms built in this time were not designed for cleaning. The before photos for bathroom renovations we completed in Safety Bay and Canning Vale show you what not to do with spacing of vanities and shower screens
As you can see the gap for cleaning is not existent, the gap is so small the owner of this home had a daily struggle with trying to clean the glass.

The error with this one is the common issue of having the vanity top touch the screen leaving an awkward cleaning space.

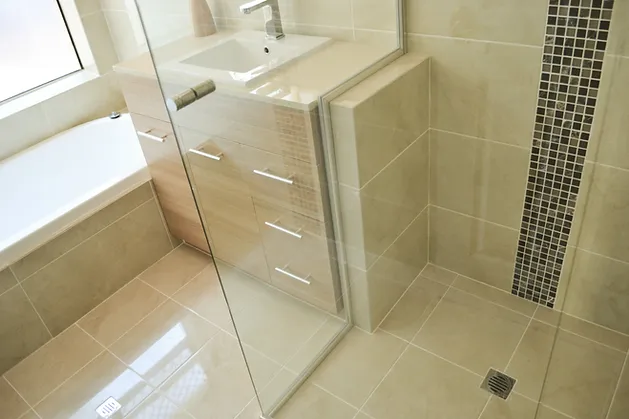
So what is the solution you ask. Better planning for one thing but the other is making a choice between a nib wall like below

Or leaving a large enough gap for cleaning.

To make this easier I will do a quick break down on the pros and cons of a nib wall
Pro’s
Great for eliminating that gap between vanity and screen
Creates a handy ledge in the shower that’s easier to clean than corner shelf or baskets
Can create a cool and modern vibe to the bathroom
Makes the shower often feel larger
Won’t get rusty or break down
Con’s
More work to build
Requires a high degree of care when waterproofing
Extra tiling and materials which increases the cost of the bathroom renovation
Will need to have a custom-made shower screen which will add to the cost of your bathroom
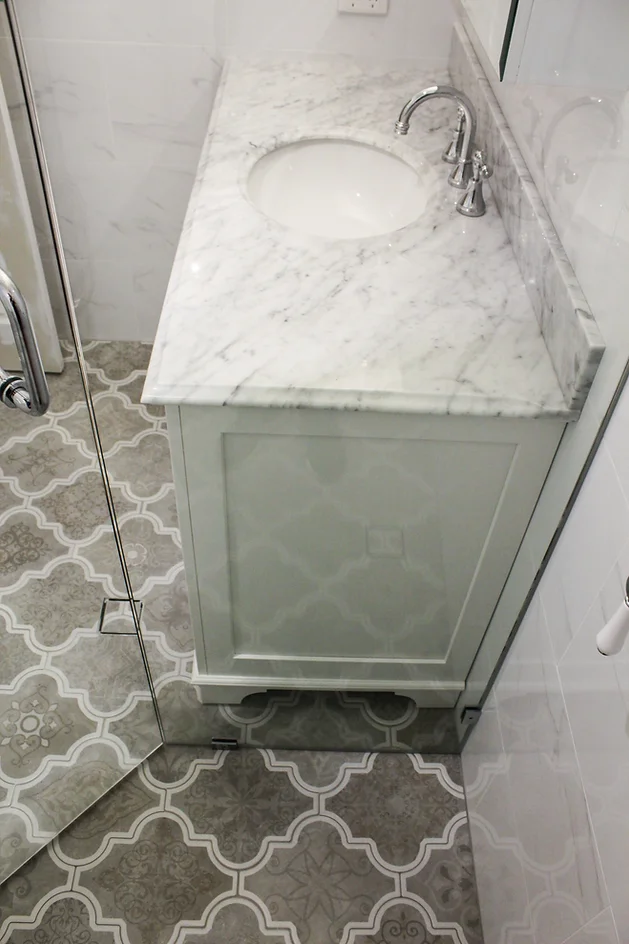
For just having a gap effectively you have decided either the costings is too high or you don’t like the feel/look of the nib wall. The key to just having a gap is making it at least a hand width for access around 100mm for cleaning. Below are some bathroom examples. In an ideal world it would be large enough to put a washing basic but often that is just not possible.

When deciding what you are going to have way up the pros and cons and decide if its right for your renovation. Take note that if you do a nib wall make sure the installer has done them a few times as the waterproofing can be a much larger deal due to the height and movement of the walls. I personally love the nib wall just as it eliminates the gap that often people hate. It acts as another shelf in the shower and can give the bathroom another wow factor that lasts the test of time.

All bathrooms are different with no two ever the same so its important to take our advice as just a guide to help you along the way. The advice we give is based on bathrooms completed in Perth WA. We at on the ball bathrooms love feed back. Let us know what you think, experiences you have had or any questions you would love to know the answer to, we will aim to help or give a little piece of mind as nothing would make us happier. If you are looking for a bathroom renovations quote and you live in Perth, Western Australia please don’t hesitate to send us an email at ontheballbathrooms@gmail.com or give us a call on 0419964678
For More DIY Tips For Renovating Your Bathroom Visit:
Website: www.ontheballbathrooms.com.au/blog
Like us on Facebook: http://facebook.com/ontheballbathrooms
High-resolution examples of all projects: https://www.houzz.com.au/pro/ontheball
Keep up with us on Instagram: https://www.instagram.com/ontheballbathrooms/
Originally seen on Ontheballbathrooms
Comments
Post a Comment