
Digital kitchen timer for IKEA DUKTIG kitchen. Beep! Beep!

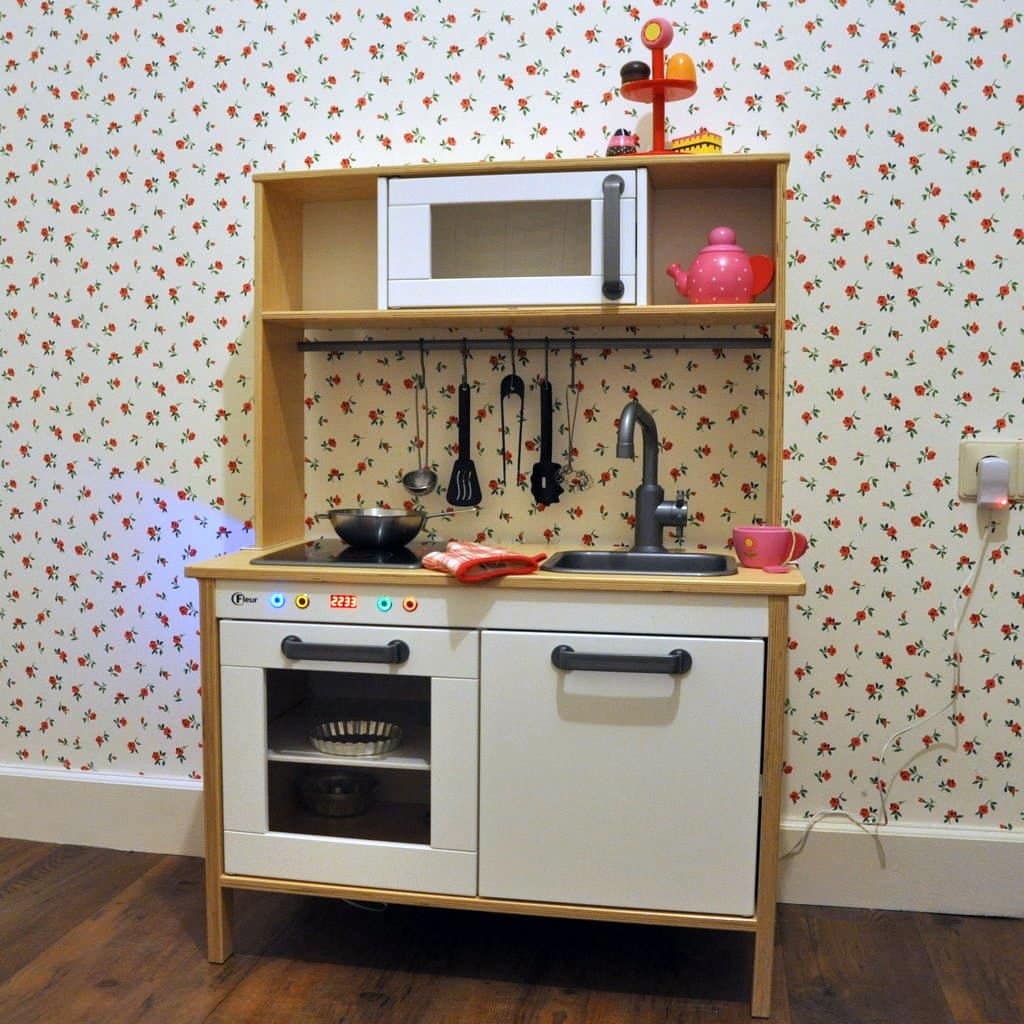
This IKEA DUKTIG playkitchen has a working digital kitchen timer (and shows the current time, when not counting down). In the end, it actually beeps! Did I mention that the oven is lit during the countdown?

The inspiration for this project came when my two year old daughter had a “small” request for her third birthday. She wanted a little kitchen that says “Beep”. “You want a what?” was my response. “A kitchen that says beep, just like mommy’s kitchen!” she said.

I shot a video of how it works.

How I added a digital kitchen timer to the IKEA DUKTIG

Building a small kitchen to play with can be very time consuming as I’m not a experienced woodworker, so I started with a ‘ready built’ wooden kitchen: the IKEA DUKTIG. From this base, I used an Arduino Nano, clock module, LED buttons and other materials to create the digital kitchen timer. See the complete list here.

Digital kitchen timer for IKEA play kitchen

Some modifications were required on the kitchen, mainly changes to front panel to accommodate the 4 LED-buttons and display. On the left side of the kitchen, I drilled a hole for the power button and on the bottom plate, a hole for the DC jack.

Digital kitchen timer for IKEA play kitchen

Then I wired up the electronics, connecting the Arduino Nano at the centre to:

  • 5V power from DC-DC buck
  • 4 buttons (Start, Stop, Plus and Minus)
  • DS3231
  • TM1637-display
  • Buzzer
  • LED-strip

When the connections were complete (and tested), I assembled the kitchen.

Digital kitchen timer for IKEA play kitchen

The timer works just like Mommy’s kitchen timer. You can set the timer using the blue button and yellow button. The blue button increases the timer and the yellow button decreases the timer. Once the timer is set, push the green button to start the timer. The red button stops the timer. You can also use the red button to stop setting the timer and make the display show the current time again.

Now, she’s happy with her kitchen that goes beep beep, just like mommy’s.

See the complete instructable for the IKEA DUKTIG digital kitchen timer.

Comments

Popular posts from this blog

Mind the gap: Fit IKEA MALM over a tall baseboard

I forgot one thing when I ordered the MALM dresser : The baseboards in my apartment are very tall and very wide. So, when I installed it, I had a 4 cm gap between the wall and the back of the cabinet which was not aesthetically possible for me. As it is not possible to cut the back of dresser at the bottom to leave room for the tall baseboard, I decided that MALM should be raised. And it was much simpler than I had imagined. You’ll need: A MALM dresser (mine is a 6-drawer chest) Six oak bed legs (I think five would have been enough, but while I was there …) 6 mounting plates A piece of plywood the size of the bottom of the cabinet (I went to the hardware store next door, it cost me less than 5€) Screws White adhesive edging tape How to raise the MALM dresser above a tall baseboard Place the MALM upside down. Fix the plywood onto the underside of the MALM with screws. Predrill holes for the leg screws (if you have the same baseboard problem as me, make sure you measur...

How to Document the Home Building Process

Building your home is a unique experience filled with stories you will never forget. There is also important information you need to remember if you build, even after you settle in. Whether it’s for your family or for future renovations, documenting your build is an important part of the process. Keeping track of your documents and making sure your family stay in the loop can help you stay organized and make sure you remember everything about your build. Not sure how to stay on top of all of the details? Document the process with these simple tips so you can always look back on it fondly. Collect this idea Use social media and involve your friends. Image: Kroiss Development Keep friends and family in the loop The home building process is exciting and your friends and family will want to be included. In fact, you’ll probably find that your new home becomes a popular conversation topic. You don’t need to personally keep everyone in the loop. Instead, you can find ways to keep ev...

Brighten up: A reading lamp the book lover will love

We already had a MAGNARP table lamp in the living room, but we were missing a reading lamp next to our couch. For a standing MAGNARP floor lamp, we didn’t have space. And the available other IKEA lamps were not for our taste. I already saw solutions with FRÄCK , so I decided to make my own wall mounted reading light, fused with MAGNARP. Here goes: IKEA items used: Steps for an IKEA wall mounted reading light: 1. Take apart both sets. 2. Cut the power line of the MAGNARP to be able to pull it out from the pipe. (Cut at both ends of the switch) 3. Cut the pipe. Besides the threaded part which goes inside the bulb socket you I will need approximate 5mm. 4. Cut M10 thread on the pipe’s end, and drill over the thread inside the main plate with M10 as well. 5. Bend the mirror’s fork as seen on the picture. 6. Mark the holes from the bent fork onto the main plate, and drill holes. 7. Make the electric work with a new switch. (I laced it inside the arm before doing so...