
Stylish home with a dramatic touch

2b8b8404bb345a324f407b819f2b04c2-1200x800Stylish home with a dramatic touch - via Coco Lapine DesignStylish home with a dramatic touch - via Coco Lapine Design Stylish home with a dramatic touch - via Coco Lapine DesignStylish home with a dramatic touch - via Coco Lapine DesignStylish home with a dramatic touch - via Coco Lapine DesignStylish home with a dramatic touch - via Coco Lapine DesignStylish home with a dramatic touch - via Coco Lapine DesignStylish home with a dramatic touch - via Coco Lapine DesignStylish home with a dramatic touch - via Coco Lapine Design-1200x800Stylish home with a dramatic touch - via Coco Lapine Design

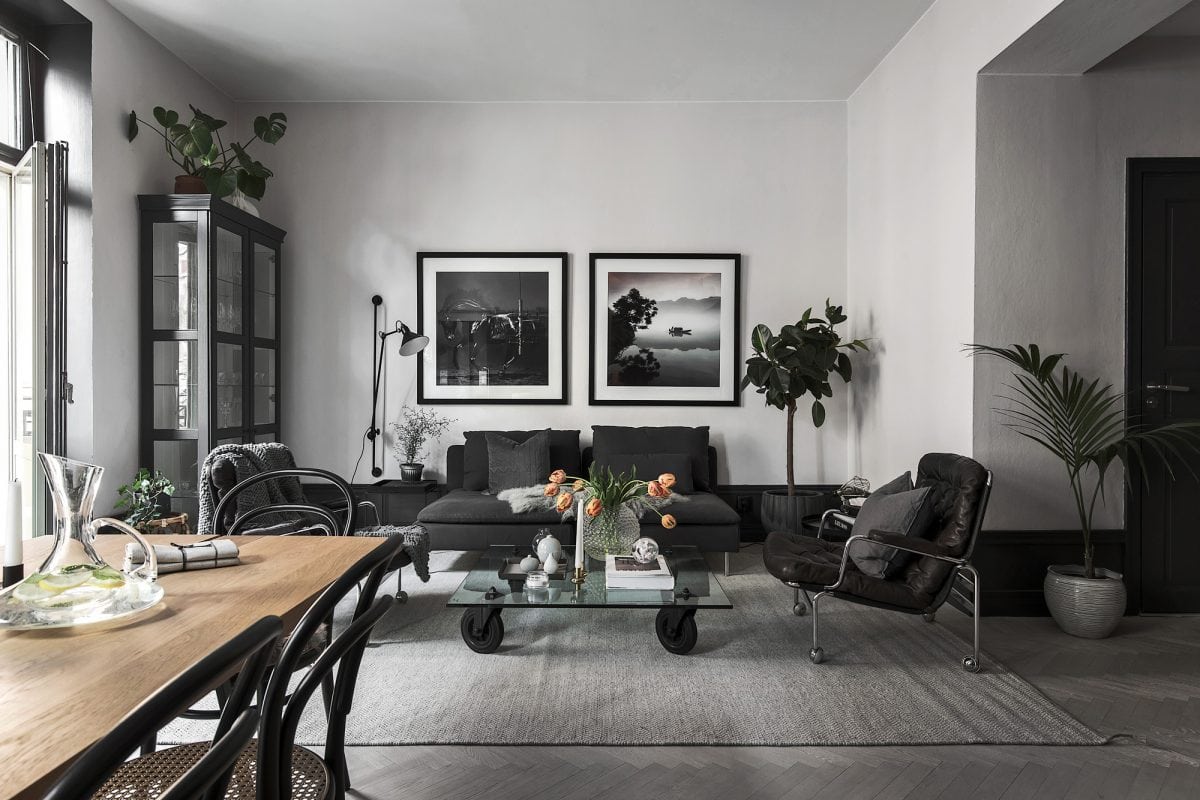
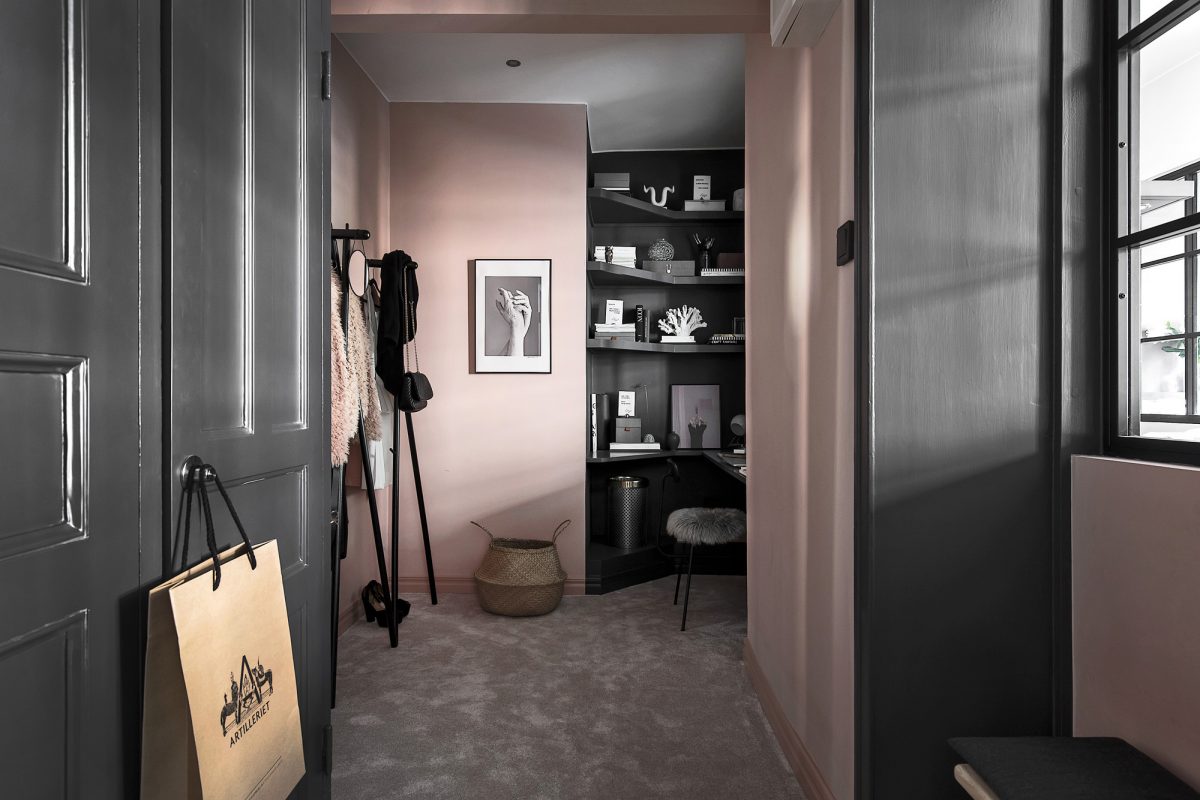
This beautiful home for sale at Inner-city specialists is decorated with a lot of dark grey and black elements, which gives it a stylish, yet dramatic look. I like the custom solutions that are incorporated here. The kitchen works very well in a relatively small space and includes wall to wall high shelving to display the nicest kitchen accessories. In the bedroom, a custom headboard was fitted, which includes space for magazines so no separate nightstands are needed, which is a nice solution as well. The build in bookshelf in the small nude pink room is a desk at the same time. I like the contrast between the dark grey and the pink here.

The area that has the most space here is the dining table, which therefor looks like it’s the central space of the home. Even though the walls are kept white in the living room, the dramatic look continues in this room as well because the window sills are painted dark grey.

First seen on Inredningshjalpen

Comments

Popular posts from this blog

Mind the gap: Fit IKEA MALM over a tall baseboard

I forgot one thing when I ordered the MALM dresser : The baseboards in my apartment are very tall and very wide. So, when I installed it, I had a 4 cm gap between the wall and the back of the cabinet which was not aesthetically possible for me. As it is not possible to cut the back of dresser at the bottom to leave room for the tall baseboard, I decided that MALM should be raised. And it was much simpler than I had imagined. You’ll need: A MALM dresser (mine is a 6-drawer chest) Six oak bed legs (I think five would have been enough, but while I was there …) 6 mounting plates A piece of plywood the size of the bottom of the cabinet (I went to the hardware store next door, it cost me less than 5€) Screws White adhesive edging tape How to raise the MALM dresser above a tall baseboard Place the MALM upside down. Fix the plywood onto the underside of the MALM with screws. Predrill holes for the leg screws (if you have the same baseboard problem as me, make sure you measur...

How to Document the Home Building Process

Building your home is a unique experience filled with stories you will never forget. There is also important information you need to remember if you build, even after you settle in. Whether it’s for your family or for future renovations, documenting your build is an important part of the process. Keeping track of your documents and making sure your family stay in the loop can help you stay organized and make sure you remember everything about your build. Not sure how to stay on top of all of the details? Document the process with these simple tips so you can always look back on it fondly. Collect this idea Use social media and involve your friends. Image: Kroiss Development Keep friends and family in the loop The home building process is exciting and your friends and family will want to be included. In fact, you’ll probably find that your new home becomes a popular conversation topic. You don’t need to personally keep everyone in the loop. Instead, you can find ways to keep ev...

Brighten up: A reading lamp the book lover will love

We already had a MAGNARP table lamp in the living room, but we were missing a reading lamp next to our couch. For a standing MAGNARP floor lamp, we didn’t have space. And the available other IKEA lamps were not for our taste. I already saw solutions with FRÄCK , so I decided to make my own wall mounted reading light, fused with MAGNARP. Here goes: IKEA items used: Steps for an IKEA wall mounted reading light: 1. Take apart both sets. 2. Cut the power line of the MAGNARP to be able to pull it out from the pipe. (Cut at both ends of the switch) 3. Cut the pipe. Besides the threaded part which goes inside the bulb socket you I will need approximate 5mm. 4. Cut M10 thread on the pipe’s end, and drill over the thread inside the main plate with M10 as well. 5. Bend the mirror’s fork as seen on the picture. 6. Mark the holes from the bent fork onto the main plate, and drill holes. 7. Make the electric work with a new switch. (I laced it inside the arm before doing so...