Materials:
- IKEA PS 2014 Standing laptop station
- String
- Chopping board
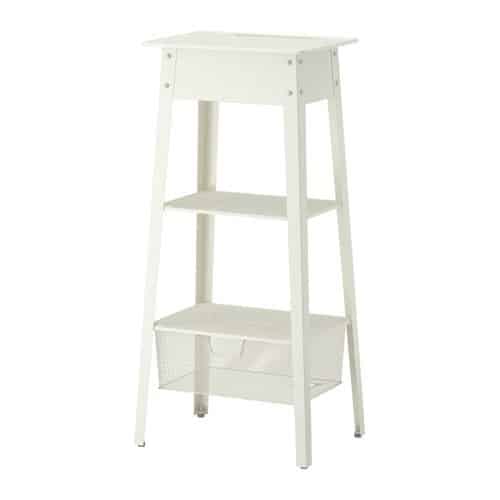
Photo: IKEA.com
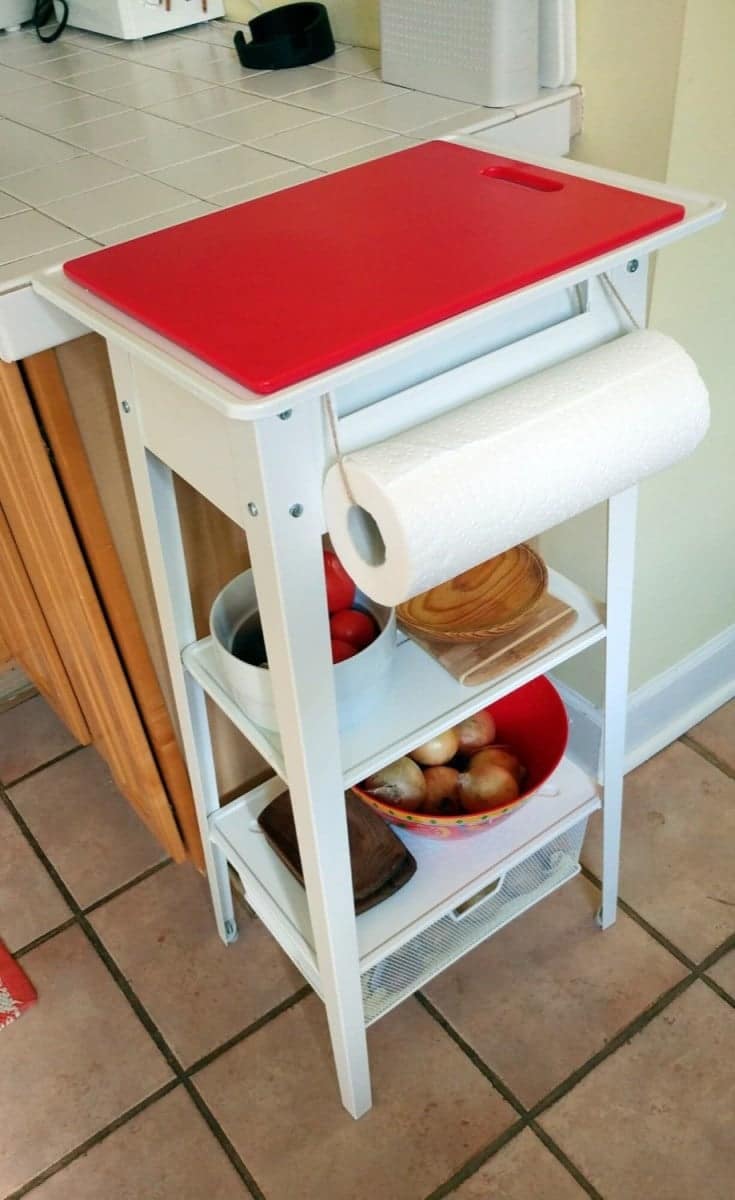
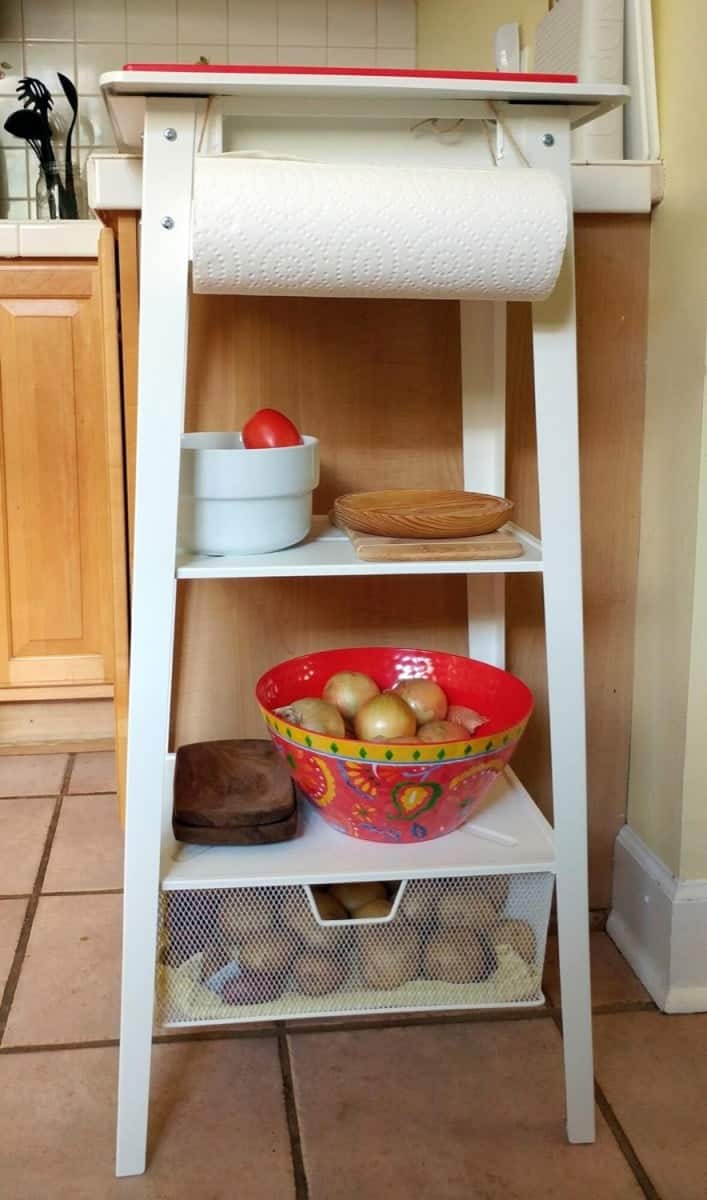
I reversed the upper tray so that the longitudinal hole that is originally meant for cables is covered. Then I added instead, in the hole for cables, a rope with a simple knot to hang the kitchen paper roll. The knot is not visible, because it stays below the upper tray.
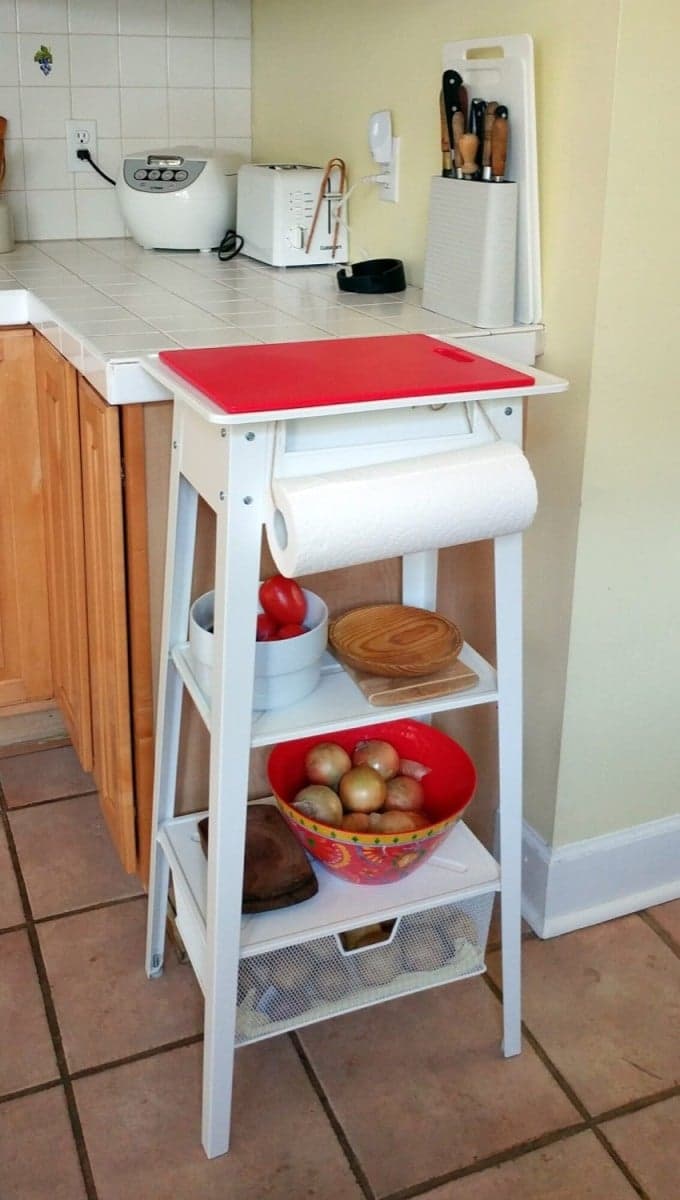
I added a red plastic chopping board that I bought at the World Market, to match with the color of my kitchen. I use the main container at the bottom for potatoes, because it is perfectly ventilated but covered. And I place accessories on the shelves to have other vegetables (tomatoes, onions) at hand.
~ by Xenia Viladas
You may also like these small kitchen island ideas

If you don’t have a spacious kitchen but would like to add an island, you’ll love this idea from Sara. It uses 2 LACK side tables (I’m sure we all have one of those tucked away somewhere) and some spare wood. The kitchen island can also be pushed out of the way when not in use. See the details.
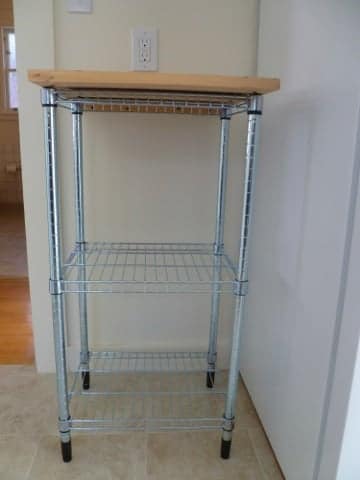
Sneak in extra kitchen counter space using the smallest Omar shelving unit and Lämplig Chopping Board. Super easy to hack. See more.

Sally needed additional workspace for her kitchen, but couldn’t find a kitchen island/cart that was small enough. She used a FAKTUM Wall Cabinet because it had just the right height, adding some feet from the DIY store. The FAKTUM is discontinued, but you can try a similar hack with the the METOD/ SEKTION kitchen cabinet instead. Get the details.
Great find from Source Ikeahacker
Comments
Post a Comment