
Beacon Hill: Cellar Window

I wanted to make sure I used the cellar window. It is supposed to go at the bottom of the the left side of the house. But because I’m putting the left side on top of a garage, and so eliminating the window opening, I decided to relocate the window to the right side of the house, under the kitchen bay.

This meant, of course, that I had to cut an opening for the window. It was fairly easy to cut through the thin foundation piece.

In fact, the foundation piece fell off as I cut it, which turned out make the window easier to put in. So maybe the cellar window should be inserted before the foundation is glued on?

The four cellar window pieces (from top to bottom): Back, sill, window trim, and window frame.

The sill slides under the foundation, the notches fitting around the foundation piece (very much like the window sills in all the other windows in the house).

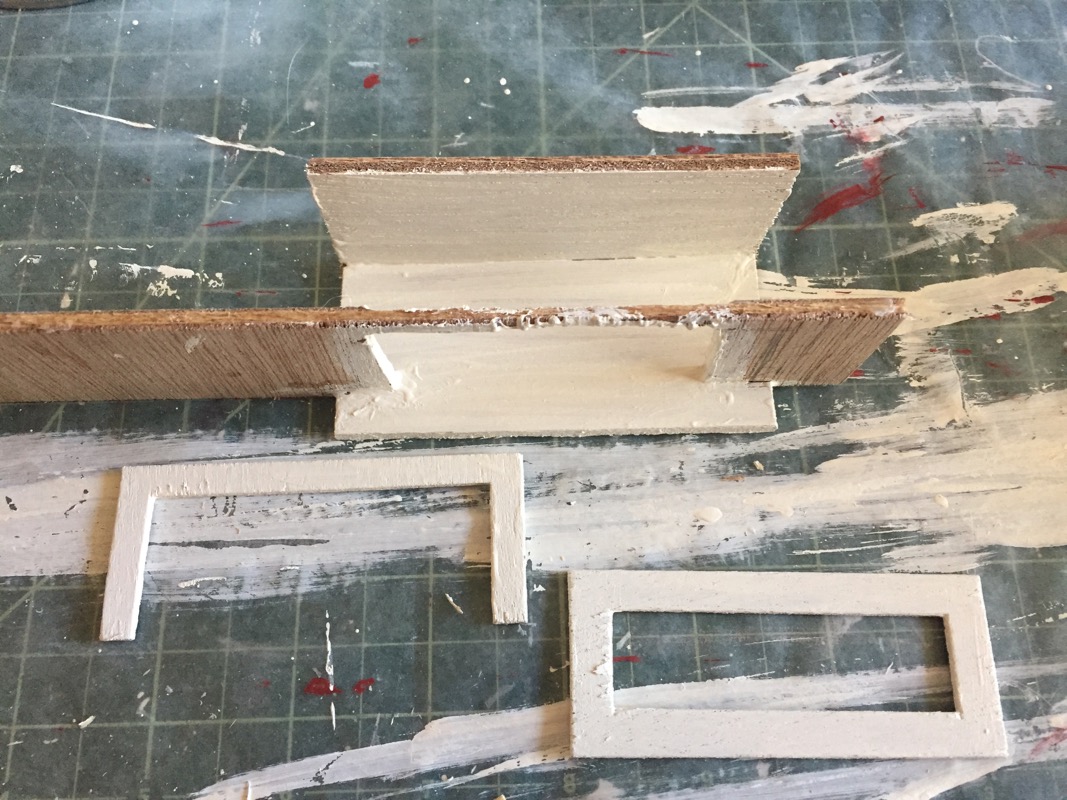
The back of the window is glued to the sill–the back’s edge is flush with the bottom of the sill. (If you glue the back on top of the sill, it will be too tall.)

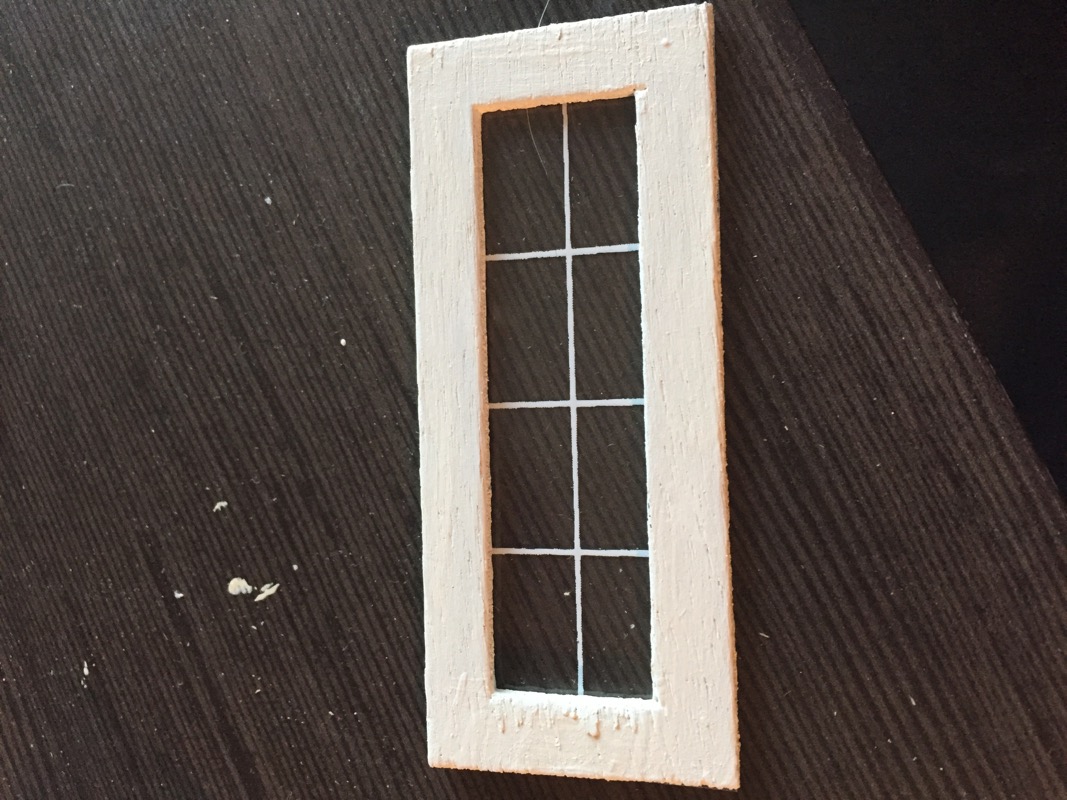
The plastic window glued to the back of the frame.

The window frame set in place, resting on the sill.

The window trim over the frame, ends resting on the sill.

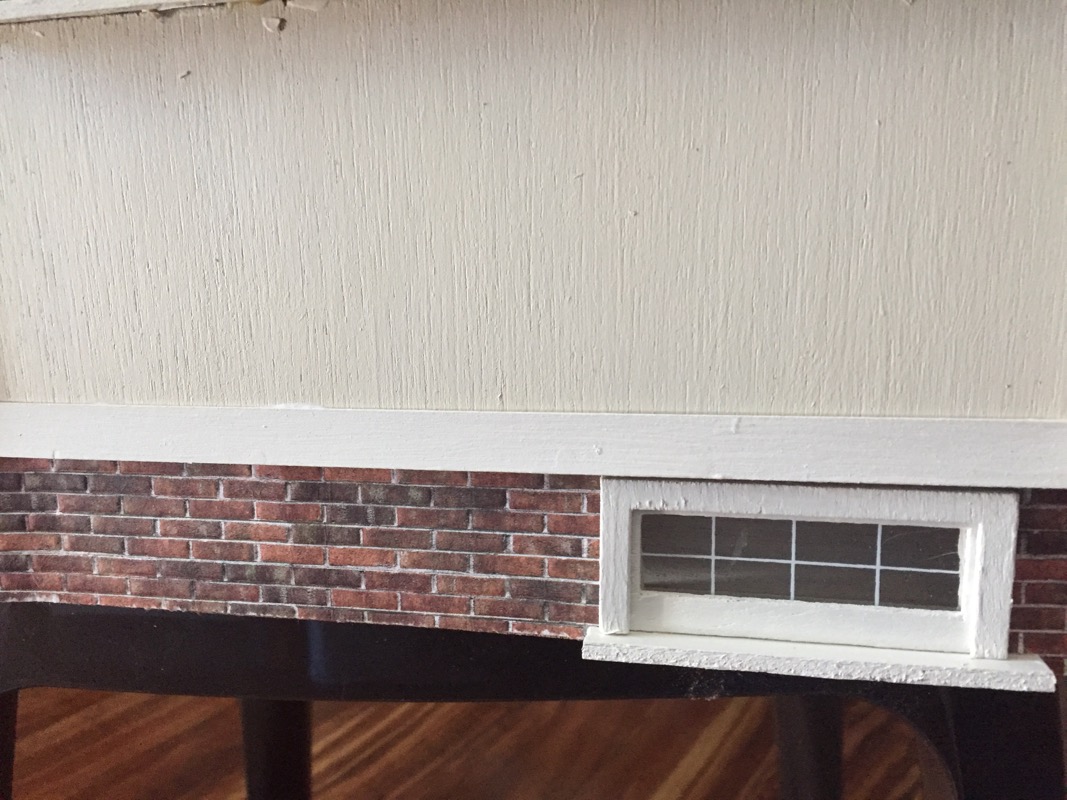
Foundation glued back on house with window in place. I added the bricks to the foundation to finish it.

The cellar window done and in place.

As you can see, I’m also in the process of bricking the foundation (textured brick paper).

Comments

Popular posts from this blog

Mind the gap: Fit IKEA MALM over a tall baseboard

I forgot one thing when I ordered the MALM dresser : The baseboards in my apartment are very tall and very wide. So, when I installed it, I had a 4 cm gap between the wall and the back of the cabinet which was not aesthetically possible for me. As it is not possible to cut the back of dresser at the bottom to leave room for the tall baseboard, I decided that MALM should be raised. And it was much simpler than I had imagined. You’ll need: A MALM dresser (mine is a 6-drawer chest) Six oak bed legs (I think five would have been enough, but while I was there …) 6 mounting plates A piece of plywood the size of the bottom of the cabinet (I went to the hardware store next door, it cost me less than 5€) Screws White adhesive edging tape How to raise the MALM dresser above a tall baseboard Place the MALM upside down. Fix the plywood onto the underside of the MALM with screws. Predrill holes for the leg screws (if you have the same baseboard problem as me, make sure you measur...

How to Document the Home Building Process

Building your home is a unique experience filled with stories you will never forget. There is also important information you need to remember if you build, even after you settle in. Whether it’s for your family or for future renovations, documenting your build is an important part of the process. Keeping track of your documents and making sure your family stay in the loop can help you stay organized and make sure you remember everything about your build. Not sure how to stay on top of all of the details? Document the process with these simple tips so you can always look back on it fondly. Collect this idea Use social media and involve your friends. Image: Kroiss Development Keep friends and family in the loop The home building process is exciting and your friends and family will want to be included. In fact, you’ll probably find that your new home becomes a popular conversation topic. You don’t need to personally keep everyone in the loop. Instead, you can find ways to keep ev...

IKEA KALLAX Queen Storage Bed

I built this prior to knowing this website existed, this probably would have saved some contemplation. For difficulty reference, I am no carpenter (electrician actually) and I built it with my right hand in a cast. We bought an old house with original hardwood flooring from the 40s so we were very concerned about damaging it. The casters on a normal bed frame put a lot of pressure on a small surface and we didn’t want it dented or damaged if things started a rockin …. Plus, a 40′s house has virtually no storage as you only needed 3 pairs of pants back then. IKEA material : 3 x KALLAX shelf units (4) 4 x KALLAX drawer kits 8 x KALLAX fabric boxes Non-IKEA material : 4 x 2×4 A grade (saves time) 2 x 2×6 2 x sheets 1/2″ plywood (what ever grade you want) 25ft x iron-on edge trim 100 x 3″ #8 wood screws 20 x 1-1/4″ #8 wood screws satin white paint Tools (I used) : Tape measure Drill w/ 1/8″ bit for piloting holes Impact driver for screws Table saw Miter saw Ass...